Skip to content

Form View

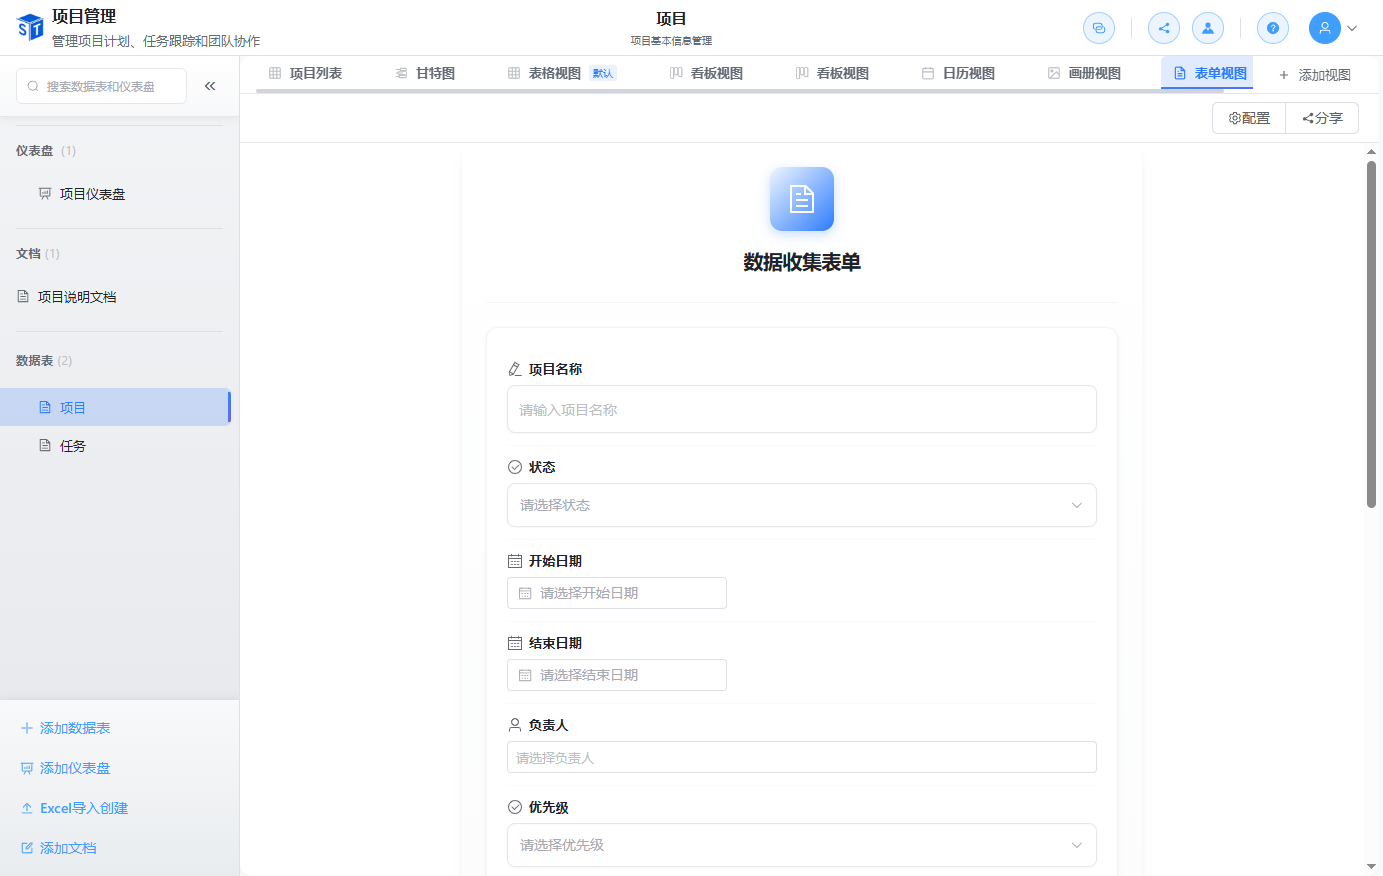
Form view turns a table into a data collection form, making it easy to gather information from external users. Each form view has independent configuration, including title, description, displayed fields, submit button text, and supports generating public share links.
When to Use

  • Collecting user feedback or survey responses
  • Registration information
  • Work order or requirement submission
  • External data entry

Creating a Form View

  1. Click + New View in the view switcher.
  2. Select the Form view type.
  3. Enter a view name and create it.

Configuring the Form

Form view configuration

Click the Configure button in the upper right corner of the form view to open the configuration panel:

ConfigurationDescription
Form titleThe main title displayed at the top of the form
Form descriptionExplanatory text below the title
Submit button textDefaults to "Submit", customizable
Success messageMessage displayed after successful submission
Displayed fieldsSelect the fields to show in the form
Allow multiple submissionsWhether the same user can submit multiple times

Field Display Rules

  • All non-system fields are displayed by default.
  • System fields (created by, created time, updated by, updated time, auto number) are not shown in the form.
  • Fields can be manually checked or unchecked.
  • At least one field must be selected to save the configuration.

Field Validation

  • Required fields automatically show required indicators.
  • Email, phone, URL, and other fields are validated by type.
  • Single select and multi-select fields show configured options.

Sharing the Form

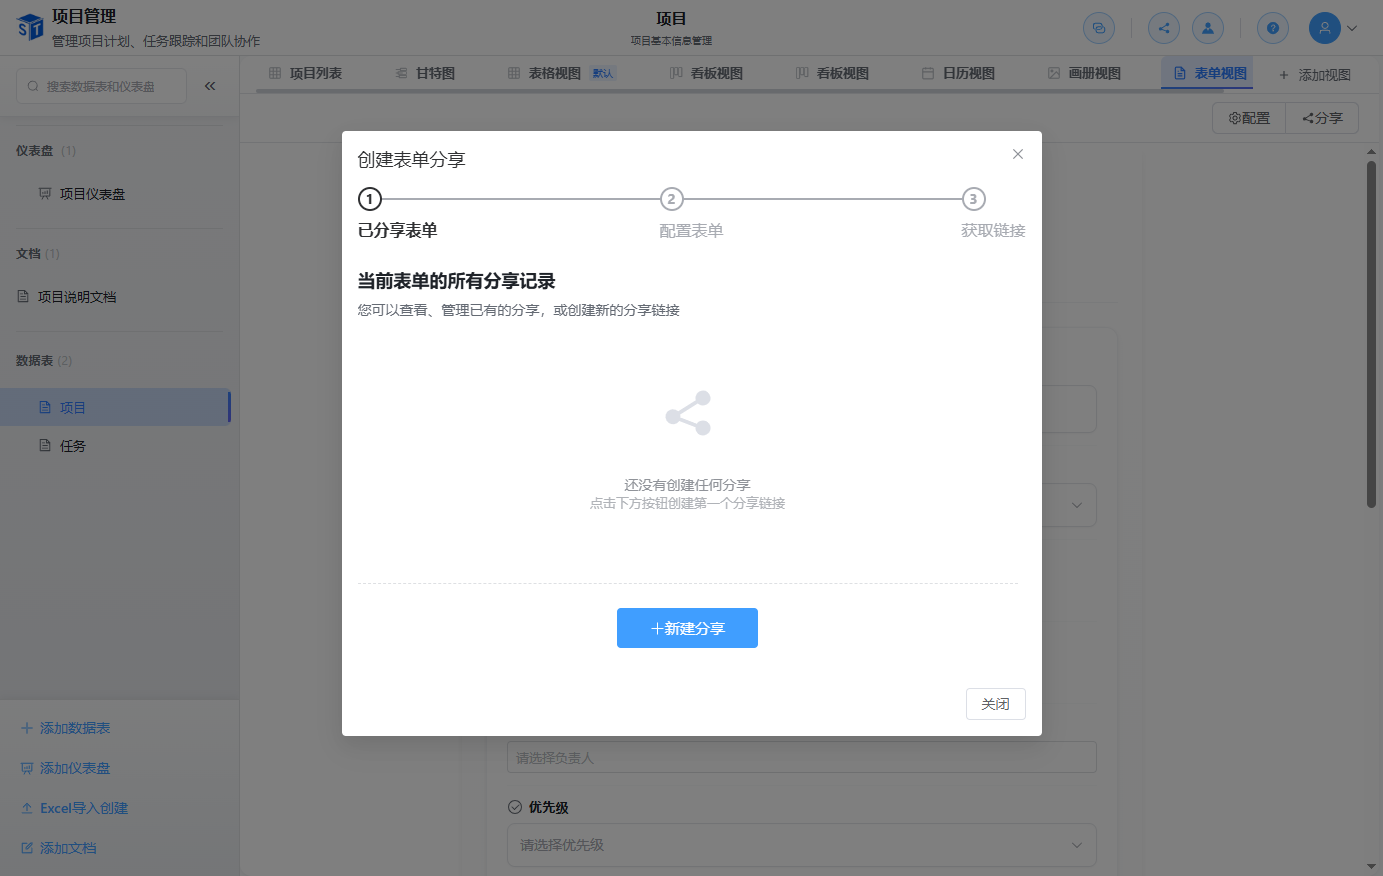
Form sharing settings

Form view supports generating public share links so external users can access and submit data.

Creating a Share

  1. Click the Share button in the form view.
  2. Configure share options:
    • Allow anonymous submission: Submit without logging in
    • Require CAPTCHA: Require CAPTCHA verification before submission
    • Expiration date: Set the validity period of the share link
    • Maximum submissions: Limit the total number of submissions
    • Allowed fields: Select the fields displayed in the shared form
  3. Click Create Share, and the system will generate a share link.

Managing Shares

  • Multiple share links can be created for one form view.
  • Share links can be enabled, disabled, or deleted at any time.
  • Submission count and status can be viewed for each share link.

Submitting Data

  • External users open the form through the share link.
  • After filling out and submitting, data is automatically written to the current table.
  • A success message is displayed after submission.

Viewing Submissions

  • Submitted data appears as new records in the table.
  • Records can be viewed, filtered, and edited in table view or other views.

Security Suggestion

For sensitive data collection, it is recommended to enable CAPTCHA and set a submission limit, while avoiding the exposure of sensitive fields in the shared form.

Next Steps

Released under the MIT License.